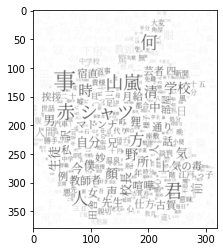
wordcloud
- 便利なライブラリwordcloudが用意されている
ギャラリー
maskを適応し色味も合わせる

- 背景画像を適応
- 日本語の
NotoSerifJP-Light.otfを適応 - 色味も背景画像を用いて編集
from os import path
from imageio import imread
import matplotlib.pyplot as plt
import os
from wordcloud import WordCloud, ImageColorGenerator

# get data directory (using getcwd() is needed to support running example in generated IPython notebook)
d = path.dirname(__file__) if "__file__" in locals() else os.getcwd()
font_path =  './font/NotoSerifJP-Light.otf'
back_coloring = imread('./imgs/575-5752776_apple-clip-art-apple-logo-black-png-transparent.png')
# Read the whole text.
text = open('./text/dump.txt').read()
# wc = WordCloud(font_path=font_path, background_color="white", max_words=2000, mask=back_coloring,  max_font_size=40, random_state=42, width=1000, height=860, margin=2, ).generate(text)
wc = WordCloud(font_path=font_path, background_color="white", max_words=2000, mask=back_coloring,  max_font_size=40, random_state=42, margin=1, ).generate(text)
# create coloring from image
image_colors_default = ImageColorGenerator(back_coloring)
plt.figure()
# recolor wordcloud and show
plt.imshow(wc, interpolation="bilinear")
plt.axis("off")
plt.show()
# save wordcloud
wc.to_file("./out.jpg")
# create coloring from image
image_colors_byImg = ImageColorGenerator(back_coloring)
plt.imshow(wc.recolor(color_func=image_colors_byImg), interpolation="bilinear")
# show
# we could also give color_func=image_colors directly in the constructor
#plt.imshow(wc.recolor(color_func=image_colors_byImg), interpolation="bilinear")
#plt.axis("off")
#plt.figure()
#plt.imshow(back_coloring, interpolation="bilinear")
#plt.axis("off")
#plt.show()

# save wordcloud
#wc.to_file("./out.jpg")